Saturday, December 19, 2009

Have you missed me??


A lot has been going on since my last post......and I do mean a LOT! But let me introduce you to the newest member of our family. Meet Kaden Anthony Minasian, born on December 17, 2009. The little man arrived weighing 6 pounds, 14 ounces and was 20.5 inches long. He was welcomed into the world by his mom & dad, Crissy & Rob, brother Christopher and sister Kariann. Isn't he beautiful?


Sunday, November 1, 2009


Last night was a lot of fun. We had some adorable trick or treaters. This group was not that cute, but the one with the red face is my oldest grandson and these are some of his friends. They called themselves "Wurld Domunashun" and that was a very scary thought. The spelling was a farce. They're all a bunch of brainiacs. At least they had a fun and safe Halloween night.
I used My Digital Studion to create this layout. What fun that is! I think I have a new addiction!

Thursday, October 29, 2009


My husband's Aunt Josie passed away recently. We will miss her. I made some thank you cards for the family to send. I wanted something simple, yet elegant and something that would make Aunt Josie smile. This design uses Stampin' Up!'s "Elegant Bouquet" embossing folder to create the raised images. They are then "dusted" with pastels and dotted with glitter. The embossed piece is framed by Basic Gray cardstock and a tiny bow is tied on using Basic Gray taffeta ribbon. So Saffron Designer Series paper is nestled behind the gray and all is mounted onto one of the Whisper White note cards (I love these little note cards!). A personal note was printed inside thanking the recipient for their kind expression of sympathy. Yes, I think Aunt Josie would like these cards.

More Halloween Projects?


One last (maybe) Halloween project to share. I love these little Fancy Favor boxes made with my Big Shot. This one is done in black cardstock, but I added cute little pumpkins from "The More The Merrier" hostess set. Old Olive grosgrain and Old Olive Striped ribbons dress it up a bit and even though they aren't really visible here, I used Pumpkin Pie corduroy buttons on the sides. Finish it off by adding a "Trick or Treat" tag at the bottom from the "Holiday Best" hostess set and add some "googlie" eyes to a couple of the pumkins and it's ready to go. Oh, don't forget to add the candy! This one had some candy corn in a cello bag and a Halloween themed pencil added to a bookmark. I sent this and another bag to my 4 year old grandson. He wanted to give his teachers a treat. He is such a sweet little boy. He turns 5 next week and I can't wait to see him and his new baby sister -- and their parents, of course. :-)

Friday, October 16, 2009

Pccket Card for Baby Boy


Well, this was a fun card to design. I wanted to give Crissy and Rob the receipt for the gift we ordered for them, but I wanted to make something special for them. There are little surprises all through this pocket card, but the shower isn't until Sunday, so I don't want to spoil the final surprise by telling them what we got them. I hope they enjoy the card...and the gift. I hope they soon come up with a name for this baby, too!


Our oldest daughter will be giving birth to our 6th grandchild (the 4th boy) in December and we're having a baby shower for her this weekend. I made this cute little gift card to go with one of her gifts. I just couldn't resist adding the tiny rhinestone brad for the whale's eye.

Tuesday, October 13, 2009


*** A challenge was issued to my team to use a small calendar to make a project. Here are 2 of the examples from last night's meeting. Both are "desk" calendars that stand up. Watch for postings of other calendar projects coming soon. For next month's challenge, each member is to bring a Christmas card design using non-traditional colors. This should be very interesting!

Sunday, October 4, 2009


One of the very talented ladies in my downline turned me on to this color combination: Bermuda Bay and Gable Green with a touch of silver. Thanks, Dottie!! I have to admit, it is a stunning combination. The center snowflake is stamped with silver Encore, then embossed with silver e.p. and the square rhinestone brad in the center really looks like the Bermuda Bay accent color. The background snowflakes are stamped with the new Platinum Shimmer Paint. That stuff is way too much fun! I would love to get your opinion of this color combo. Let me know what you think!
I must have had too much coffee - or not enough - when I took this picture. :-) This is a modification of the example in the Stampin' Up! Holiday Mini Catalog and another project for World Card Making Day. We loved the ornament punch - especially after cutting out all those leaves on the last project. The snowflake background is made by applying 2-way glue pen to the snowflake stamp and stamping the card. Then Dazzling Diamonds glitter was applied to the card. Ooooh! Aahhh! I know....it's just too easy! The Rhinestone brad in the green ornament was one of my favorite touches.

Bermuda Bay is a fall color? Well, it is in Florida! I love the contrast with the Really Rust. Another project for World Card Making Day. We "daubed" the color onto the leaves then cut them out. The saying was a last minute switch because one of my customers ordered the "Wandering Words" stamp set and I just had to use it here.
Twick or tweet! One of the cards we made for World Card Making Day on October 3rd. I "borrowed" this idea from Joyce Lutz and we had so much fun with it.

Thursday, September 24, 2009


You Rock!!! Well, this card rocks. I love the Nouveau Chic DSP and it makes the perfect backdrop for the "dog tags". Isn't this a great card for a teen-ager's birthday? I hope so, because I made one for my niece, Andi who will be 15 on Friday and my grandson, TJ who will be 15 on Tuesday. The stamp set is Friends Rock. I made the tags and used clear embossing powder to make them shiny. The star brad is non SU, but it fit for this project.
Happy Birthday to both my Rock Stars!!

Happy Birthday, Andi!!! Tomorrow is my niece's 15th birthday and even though she isn't a Latina, I just had to make this cute little card for her. I know she took Spanish in school last year. I used the Quincinero stamp set and a little bit of the Pink Flamingo DSP and some Irridescent Ice embossing powder on the dress and tiara for sparkle. 2 clear rhinestone brads anchor the scallop circle at the top of the card. Inside: Feliz Cumpleanos. Todo mi amor, Tia Sandy.

Sunday, September 20, 2009


How stinkin' cute are these little Halloween Bookmarks? I love stamping on the striped ribbon with craft ink and the brad on the skeleton one is made using a Build-A-Brad. The little orange triangle eyelets are retired, but I just couldn't resist adding them to this project. The pumpkin image is from the set "Twick or Tweet" (you'll see more of that soon!) on page 10 of SU's Holiday Mini Catalog and the "Happy Halloween" is just one of 24 cute little greetings in the "Teeny Tiny Wishes" stamp set on page 145 of the 2009-10 Idea Book & Catalog. Want to see more? Click here. Check back later to see some the projects I'm planning for my October workshops. Book yours now - my calendar is filling quickly!

Saturday, September 19, 2009

My new goal


I think it is important to not only set goals, but to share them. My new goal for this year is to be invited to Leadership in Phoenix in 2010! Thanks to my awesome team and supportive customers, I am well on my way! Thank you all! Next stop - Alaska!!

Tuesday, September 15, 2009

Lexsi's Spanish class project


My friend, Lexsi needed to make a sign with her "Spanish" name for class. I supplied some chipboard and glitter, her Aunt Linda supplied some cardstock, glue, etc. and helped with the placement of the letters so that they would all fit on the page. Lexsi did all the rest of the work herself. Isn't it fabulous??? Great job, Lexsi! Did I mention that she is only 11? I think I may have a future Ink Flamingo here........

Saturday, September 12, 2009


Have I told you how much I love this DSP? It's Nouveau Chic and the colors are fabulous! Sage Shadow, Apricot Appeal, Basic Gray.
All very subtle colors that create some stunning effects. These cards were a snap to make, but I love the impact. Tell me what you think.

This little Angel stamp set is now retired but I couldn't resist making this card for my friend, Linda's birthday. She loves angels and she is one. I watercolored the angel, then cut her out and popped her up on the cloud. The hearts are covered with tiny drops of Crystal Effects to make them look wet. The little flowers are from Pocket Silhouettes. I'm really glad she's my friend and I wish everyone had at least one friend like her. Happy Birthday, Linda. Oh, the really funny part about this card ---- I borrowed the stamp set from Linda!

How about some color? Wow! This is the Circle Circus stamp set and when I took it out of the box, it just screamed color at me so this is what I did with it. Such a fun card deserves to be given to a fun person, so I gave it to Tammy for her birthday. I think she just turned 29 --- again! Happy Birthday, Tammy!

Ooooooh! Don't you just love copper? I wish it was still available. I found this piece of copper cardstock and just had to make this card. The leaf is stamped on copper c/s, then cut out. A bone folder was used to make the "veins". The layers of "eyelet" are Chocolate Chip textured c/s, Autumn Meadows DSP and Copper Metallic (retired). I layered Bermuda Bay Polka Dot Grosgrain ribbon onto Double-stitched chocolate chip grosgrain and added Rhinestone brads to the leaf and the "happy birthday". I wonder who will get this card for her birthday on October 4th? Shhhh! Don't tell, but it's for my Aunt Linda who is convinced we don't have maple trees in Florida. ??? Maybe if she would visit me she would find out that we do. Until then, I will just tease her with this pretty copper leaf card. Hope she likes it!


Greetings! I recently met with a very nice couple who plan to wed next October. We were discussing some colors and designs for some "Save the Date" cards. The groom's mother is a very good friend and the newest member of my flock of Ink Flamingos (Welcome, Linda!!) and she came over today to help me with the designs using some of the colors chosen by the bride and groom. These are some examples we made and will send to the happy couple as we begin the process of selection. I would love to hear what YOU think. Leave a comment and let me know which design and/or color combination is your favorite. Of course, being Gator Alumni, they had to have at least one example with orange and blue. The trifold is a variation of the project shown in the 2009-2010 Idea Book & Catalog. If you don't have your copy, click here and contact me.

Tuesday, September 8, 2009


I promised my daughter that I would make a card for her friend, Feather. Yesterday was her birthday and she is totally into the whole "Twilight" thing. This is the card I came up with. Hope she liked it. I used the "Just Jawing" stamp set (love it!) and the new "From the Crypt" set with a little greeting from "On Your Birthday". I'm not a big fan of the vampires and I haven't read any of the Twilight Series, but I know there are bats involved. Ewwww! Anyway, hope you had a happy birthday, Feather!

Thursday, September 3, 2009

Inspired by Kailey


Our second beautiful granddaughter was born in June and we just had to spend some time getting to know her. She is as sweet as she is beautiful and inspired me to make these announcements for her mommy (our youngest daughter) to send out. The color palette was taken from the personalized blanket. I've had this cute little bunny stamp set for years and it retired a couple of years ago, but I'm glad I hung onto it. Reminds me of the Velveteen Rabbit - always one of my favorite stories to read to my kids.


The announcement is a simple pocket card with Kailey's picture on the insert. I heard it once said that "only boring women use plain envelopes", so of course I had to stamp the envelope, too. I made 25 of these announcements and I hope the recipients enjoyed receiving them as much as I enjoyed making them. Each one was filled with love. After all, our precious little Kailey is a very special little girl. I know Big Brother, Noah will take very good care of his little sister.

Sunday, August 30, 2009

So, this is blogging.....


After months of encouragement from my blogging friends, I finally decided to join the blogging nation. You may have seen my FaceBook or My Space entries or even followed me on Twitter (never really got that) or perhaps you weren't interested in being a friend to all my other friends so you can take a peek into my life in a more simplified manner via this blog.


If you are visiting this blog voluntarily without being a member of my family or those close friends who are obliged to visit here frequently, bless you and I hope you find something of interest here from time to time.


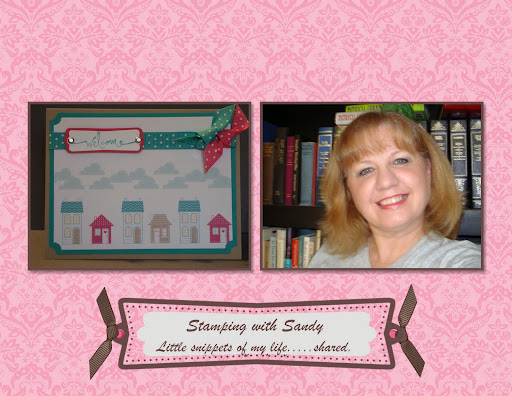
I have been a devoted stamper for about 10 years now, but I've been a demonstrator for Stampin' Up! for 5 wonderful years. I can't imagine my life without stamping. I want to use this blog to share some of my projects with you. Today, I was working on some cute little boxes for Halloween treats. I love ribbon and you will be hard-pressed to find a project without some ribbon tied to it somewhere. I also like subtle details that really give a project some punch, such as the cute little brads I made using Stampin' Up!'s Build-A-Brad and the new Designer Series Paper, "Cast A Spell".


If you would like to know more about Stampin' Up! and all the fun you can have as a hostess, demonstrator or just a stamper, click here to learn more.


I am frequently asked about what it takes to "be a demonstrator" and what that all means, so I wanted to share some answers to common questions here.


What are the benefits of becoming a demonstrator?Besides the incredible savings on the stamps in the Starter Kit, you will also receive a full color magazine from Stampin' Up! each month. It includes MANY different stamping and business ideas. Don't forget out exclusive Home Decor and the New! My Digital Studio.You will also have access to the demonstrator section of the Stampin' Up! website. There is a LOT of information on the website, including information on getting bookings and workshop advice, recruiting, stamping techniques, business ideas, newsletter archives, monthly special flyers, and checklists and tracking forms for keeping your business organized.One of my favorite things on the website is the Stamper's Showcase, where new samples are posted every day. You can even search by stamp set or keyword to help you find ideas with the stamps and supplies you already have.


Do you get free stamps? Yes! The company has different promotions throughout the year where we can earn free stamps—even hostess sets!And you can earn "Great Rewards" based on your quarterly sales. Great Rewards items include catalog merchandise as well as clothing, cameras, jewelry, and more!


What kind of training do you get?You decide how much training you want. I am available for one-on-one training and am always just a phone call or email away. Stampin’ Up! holds an annual convention every year in Salt Lake City and one-day regional seminars throughout the year across the country. These events are great training for every level of demonstrator. Also new to the Stampin' Up! website you will find some fabulous Webinars that are chock full of helpful information to help you build your business. Of course, the most important part of becoming a demonstrator, is that you will be part of an amazing team of Ink Flamingos!


How much do you make? What is your discount? Your commission is based on how much you sell (or purchase for yourself). You automatically get 20% off of every order you place—instantly! You then get a rebate commission every month depending on how much your sales were for the month, ranging 4-20%. You can also earn commission on your downline’s sales. (Your downline is anyone you recruit, and the people they recruit.)New demonstrators can receive a 30% discount/instant income (instead of the normal 20%) on their first order of $150 if it’s placed within the first 45 days of their start date.How much do you have to sell?The minimum is $300 per calendar quarter. Your own purchases count towards your minimums. Plus, you can be your own hostess and earn the hostess benefits yourself. The company average for a workshop is $308, so you can meet the sales requirement by doing just one workshop per quarter – or by placing orders for yourself and your friends.The first quarter that you join you do not have to meet any minimums. So if you sign up in July, August or September, you would not have to meet the minimum requirement until the October-November-December quarter, for example, and any orders you place from your start date til the end of December would count towards your quota.


Are there any penalties for dropping out? No! If you decide being a demonstrator is not for you, simply do nothing. You will automatically go inactive when you no longer meet the minimum requirements. In the meantime, you can still enjoy all of the benefits shown above, plus you would have gotten your stamps from the Starter Kit at an incredible discount! Sound like being a Stampin Up! demonstrator might be for you?? Contact me for more information or to get started! I would love to have you join my team!!!!


In closing today, I hope you enjoyed the projects and learned more about becoming a demonstrator. Thanks to Jill H. for sharing her thoughts on the subject.


Creatively Yours,
Sandy Nicotra
Your Stampin' Up! Demonstrator


Followers

About Me

My photo
Welcome to my little corner of the world. I've worked in a lot of different industries in my life, mostly sales and management and now I am enjoying just gleaning the most out of life that I can.